
When I was young, My mom made sourdough bread using this easy to make sourdough bread using a potato flake starter recipe. She would sell the loaves to friends and family members to raise money for Christmas. It was so good and everyone seemed to love it.
Fast forward about 30 years and mom no longer had any starter left. I began asking her about the recipe and we couldn’t find ours that was in the family for so long. She scoured the internet and we ultimately adapted ours from the bread recipe on The Southern Lady Cooks.
What is Sourdough Bread?
Sourdough Bread is made from a natural leavening agent. The leavening agent is fermented which gives the bread its sour flavor.
This is also the reason why sourdough bread is a healthier option because the fermented starter is full of probiotics, natural wild yeasts, and good bacteria.
Traditional Sourdough starters use flour and water to ferment. Wild yeasts and bacteria grow on this and this is what causes the bread to rise.
In this case, we are using an easy-to-make sourdough bread using a potato flake starter which starts with a commercial yeast called active dry yeast to get it started, but then wild yeast takes over after it has fermented.
Making sourdough bread at home is a rewarding experience, yielding delicious, tangy loaves with a perfect crust. For the perfect pairing, explore ideas on what to serve sourdough bread with to elevate your culinary experience.
What Does Sourdough Bread Taste Like?
As the name describes, sourdough is typically sour. The longer you let the starter ferment, the stronger the taste it has. By using the easy-to-make potato flake starter, the bread will have a mild flavor.
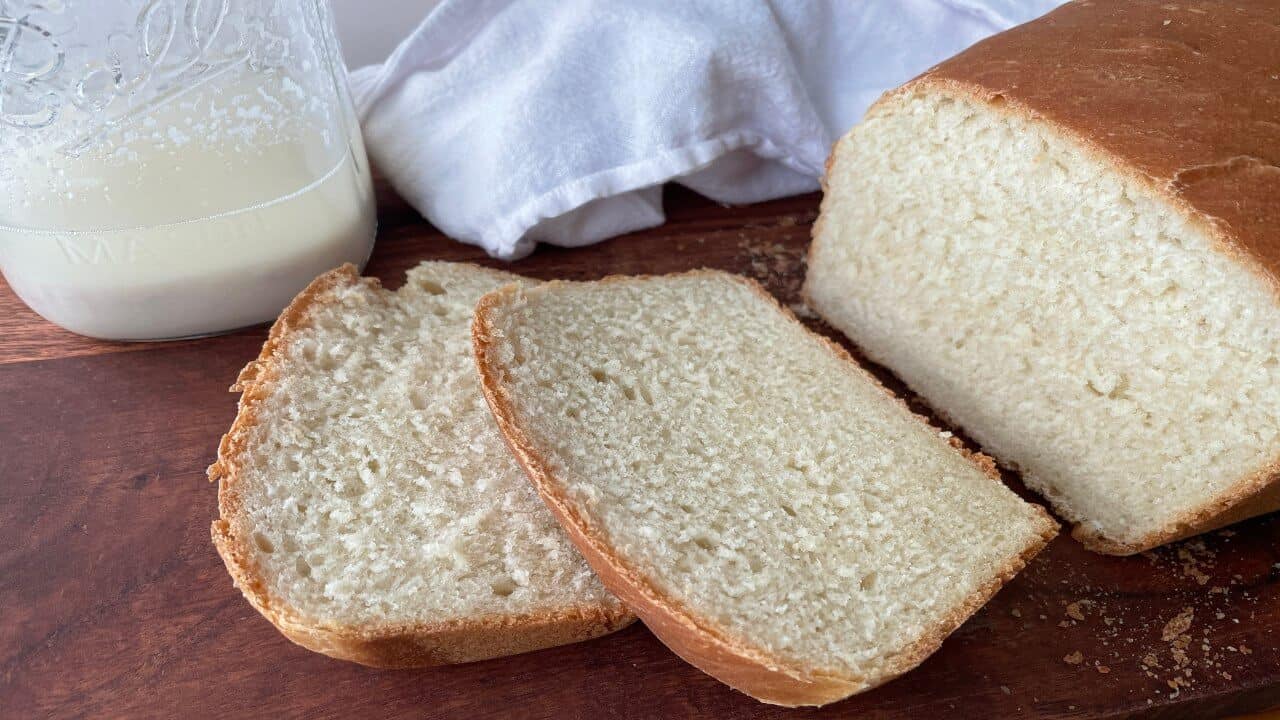
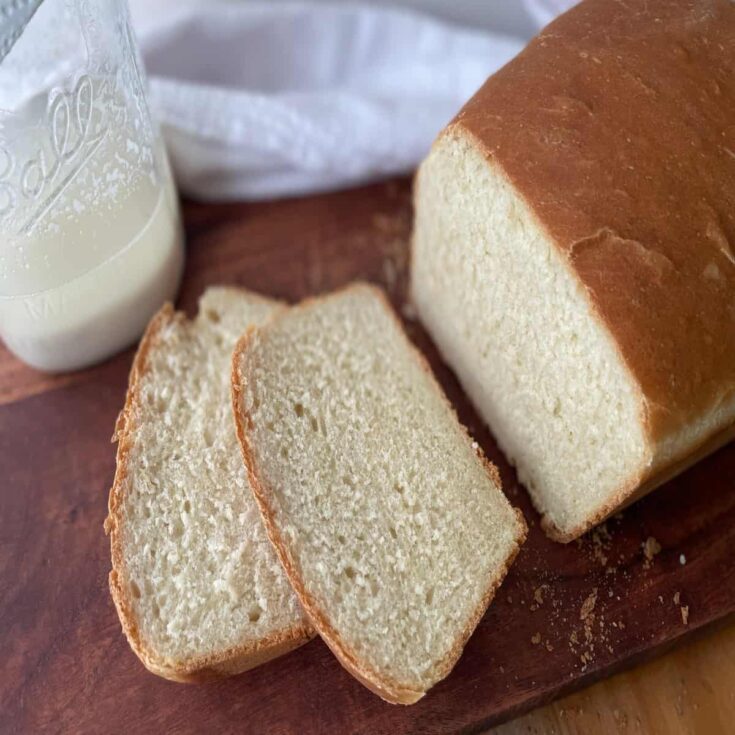
It is not quite as sour as traditional sourdough bread and it has a pleasantly sweet taste that most people love. In my opinion is the perfect bread. By using the Potato Flakes (dehydrated Potatoes) it gives the bread a much softer texture and sweeter flavor.
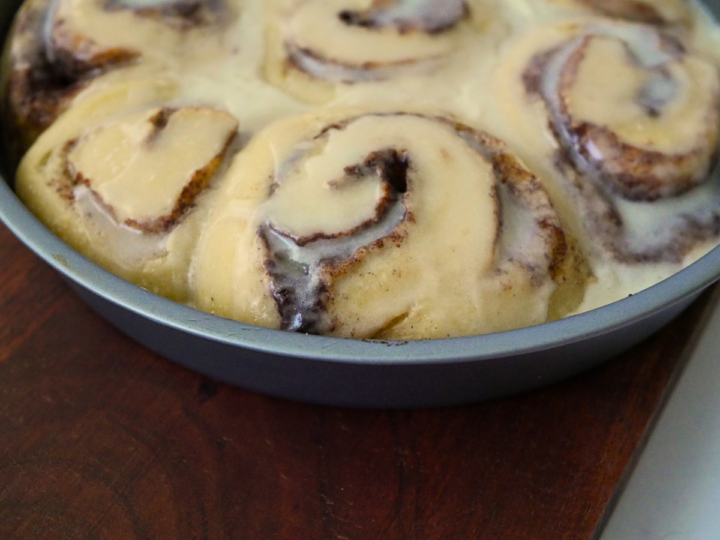
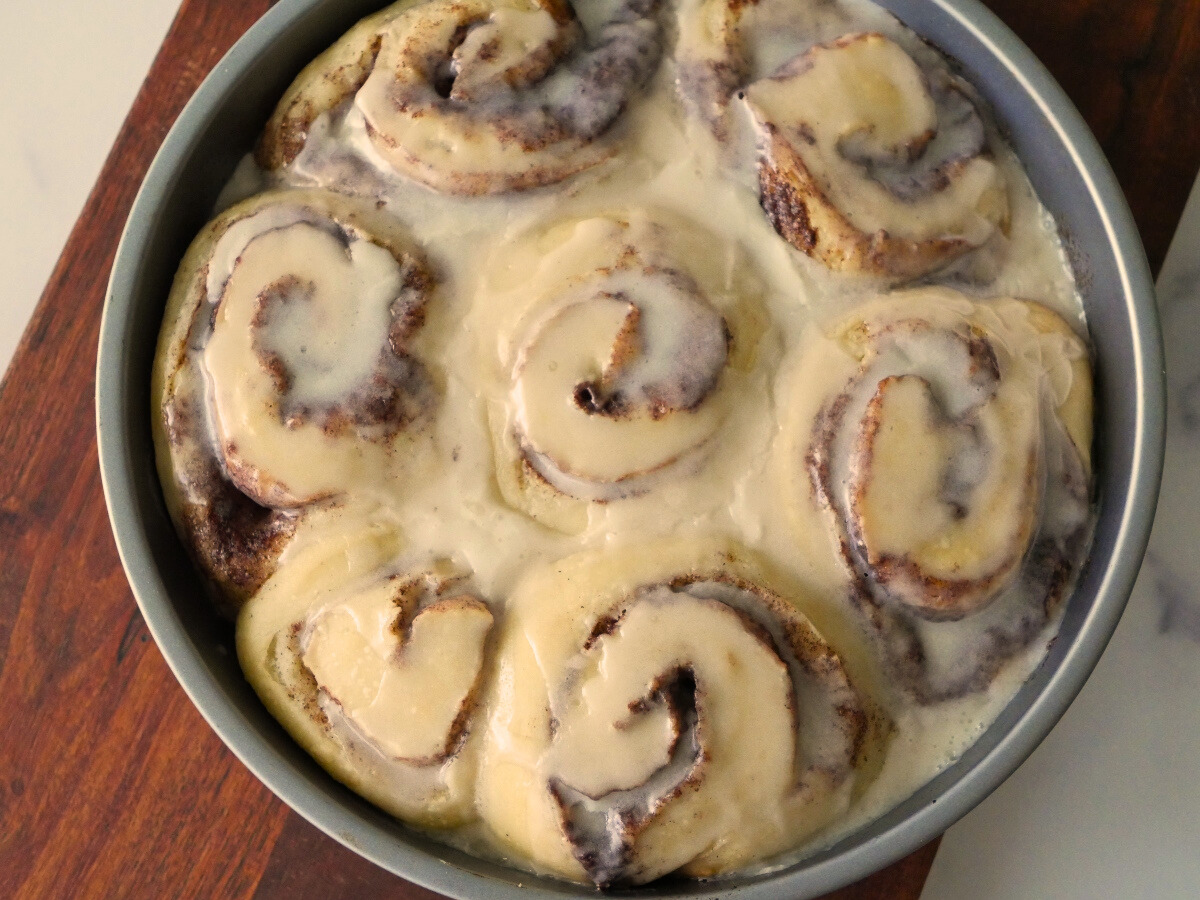
The results will be similar to traditional white bread but will have all the great benefits of sourdough bread. I often use this recipe to make sandwich bread, bread rolls, or even these awesome Sourdough Cinnamon Rolls!
How To Make it
What Ingredients Do I Need?
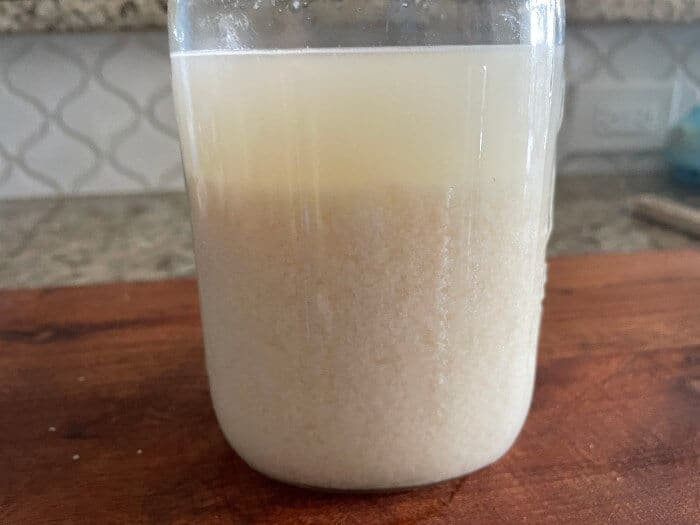
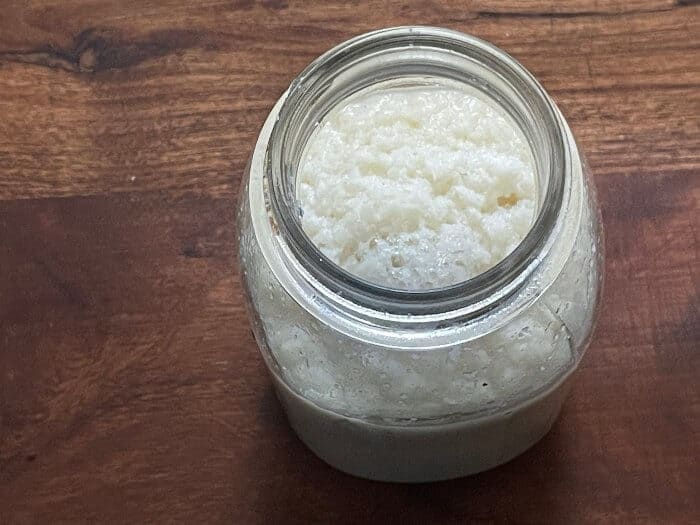
Active Sourdough Starter
Before you can make Sourdough bread using a potato flake starter, you must first have the starter. The starter takes a few days to make but once it is put together once, you just maintain it by feeding it every few days, then remove the starter you need to make your bread.
You will need 1 cup of starter
Warm Water
You will need 1 ½ cups of water that is lukewarm. This should have a temperature range of 95 to 115 degrees Fahrenheit. I like to use my instant-read thermometer to check the temperature.
Salt
Try to use sea salt or Kosher salt if you can. Normal table salt has iodine in it and can give an off-taste. You will need 1 ½ teaspoons of salt
Sugar
You will need ½ cup of White Granulated Sugar. I often use organic cane sugar if I have it on hand.
Vegetable Oil
You will need ½ Cup of Vegetable oil. I typically use canola or corn oil. I have used Olive oil in the past with great results. If you use olive oil, make sure it is a Light Extra Virgin Olive oil, something with a light taste.
Flour
In order to make this recipe, you will need either bread flour or all-purpose flour. I like to use unbleached all-purpose flour when I make my bread. Bread flour is great to use as well.
Bread flour will give a little more structure to the bread because it has a slightly higher protein count than all-purpose flour. Most people have all-purpose on hand so that is why I recommend going with it. Any brand will do but I tend to like King Arthur flour. You will need 6 cups of flour.
Follow these steps to Make it
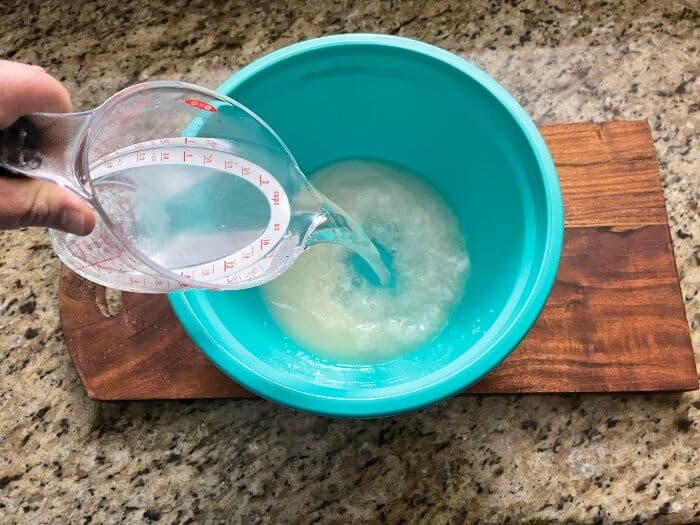
Step 1: In a large bowl, add 1 ½ cups of lukewarm water. Then add in 1 cup of starter and ½ cup of vegetable oil.
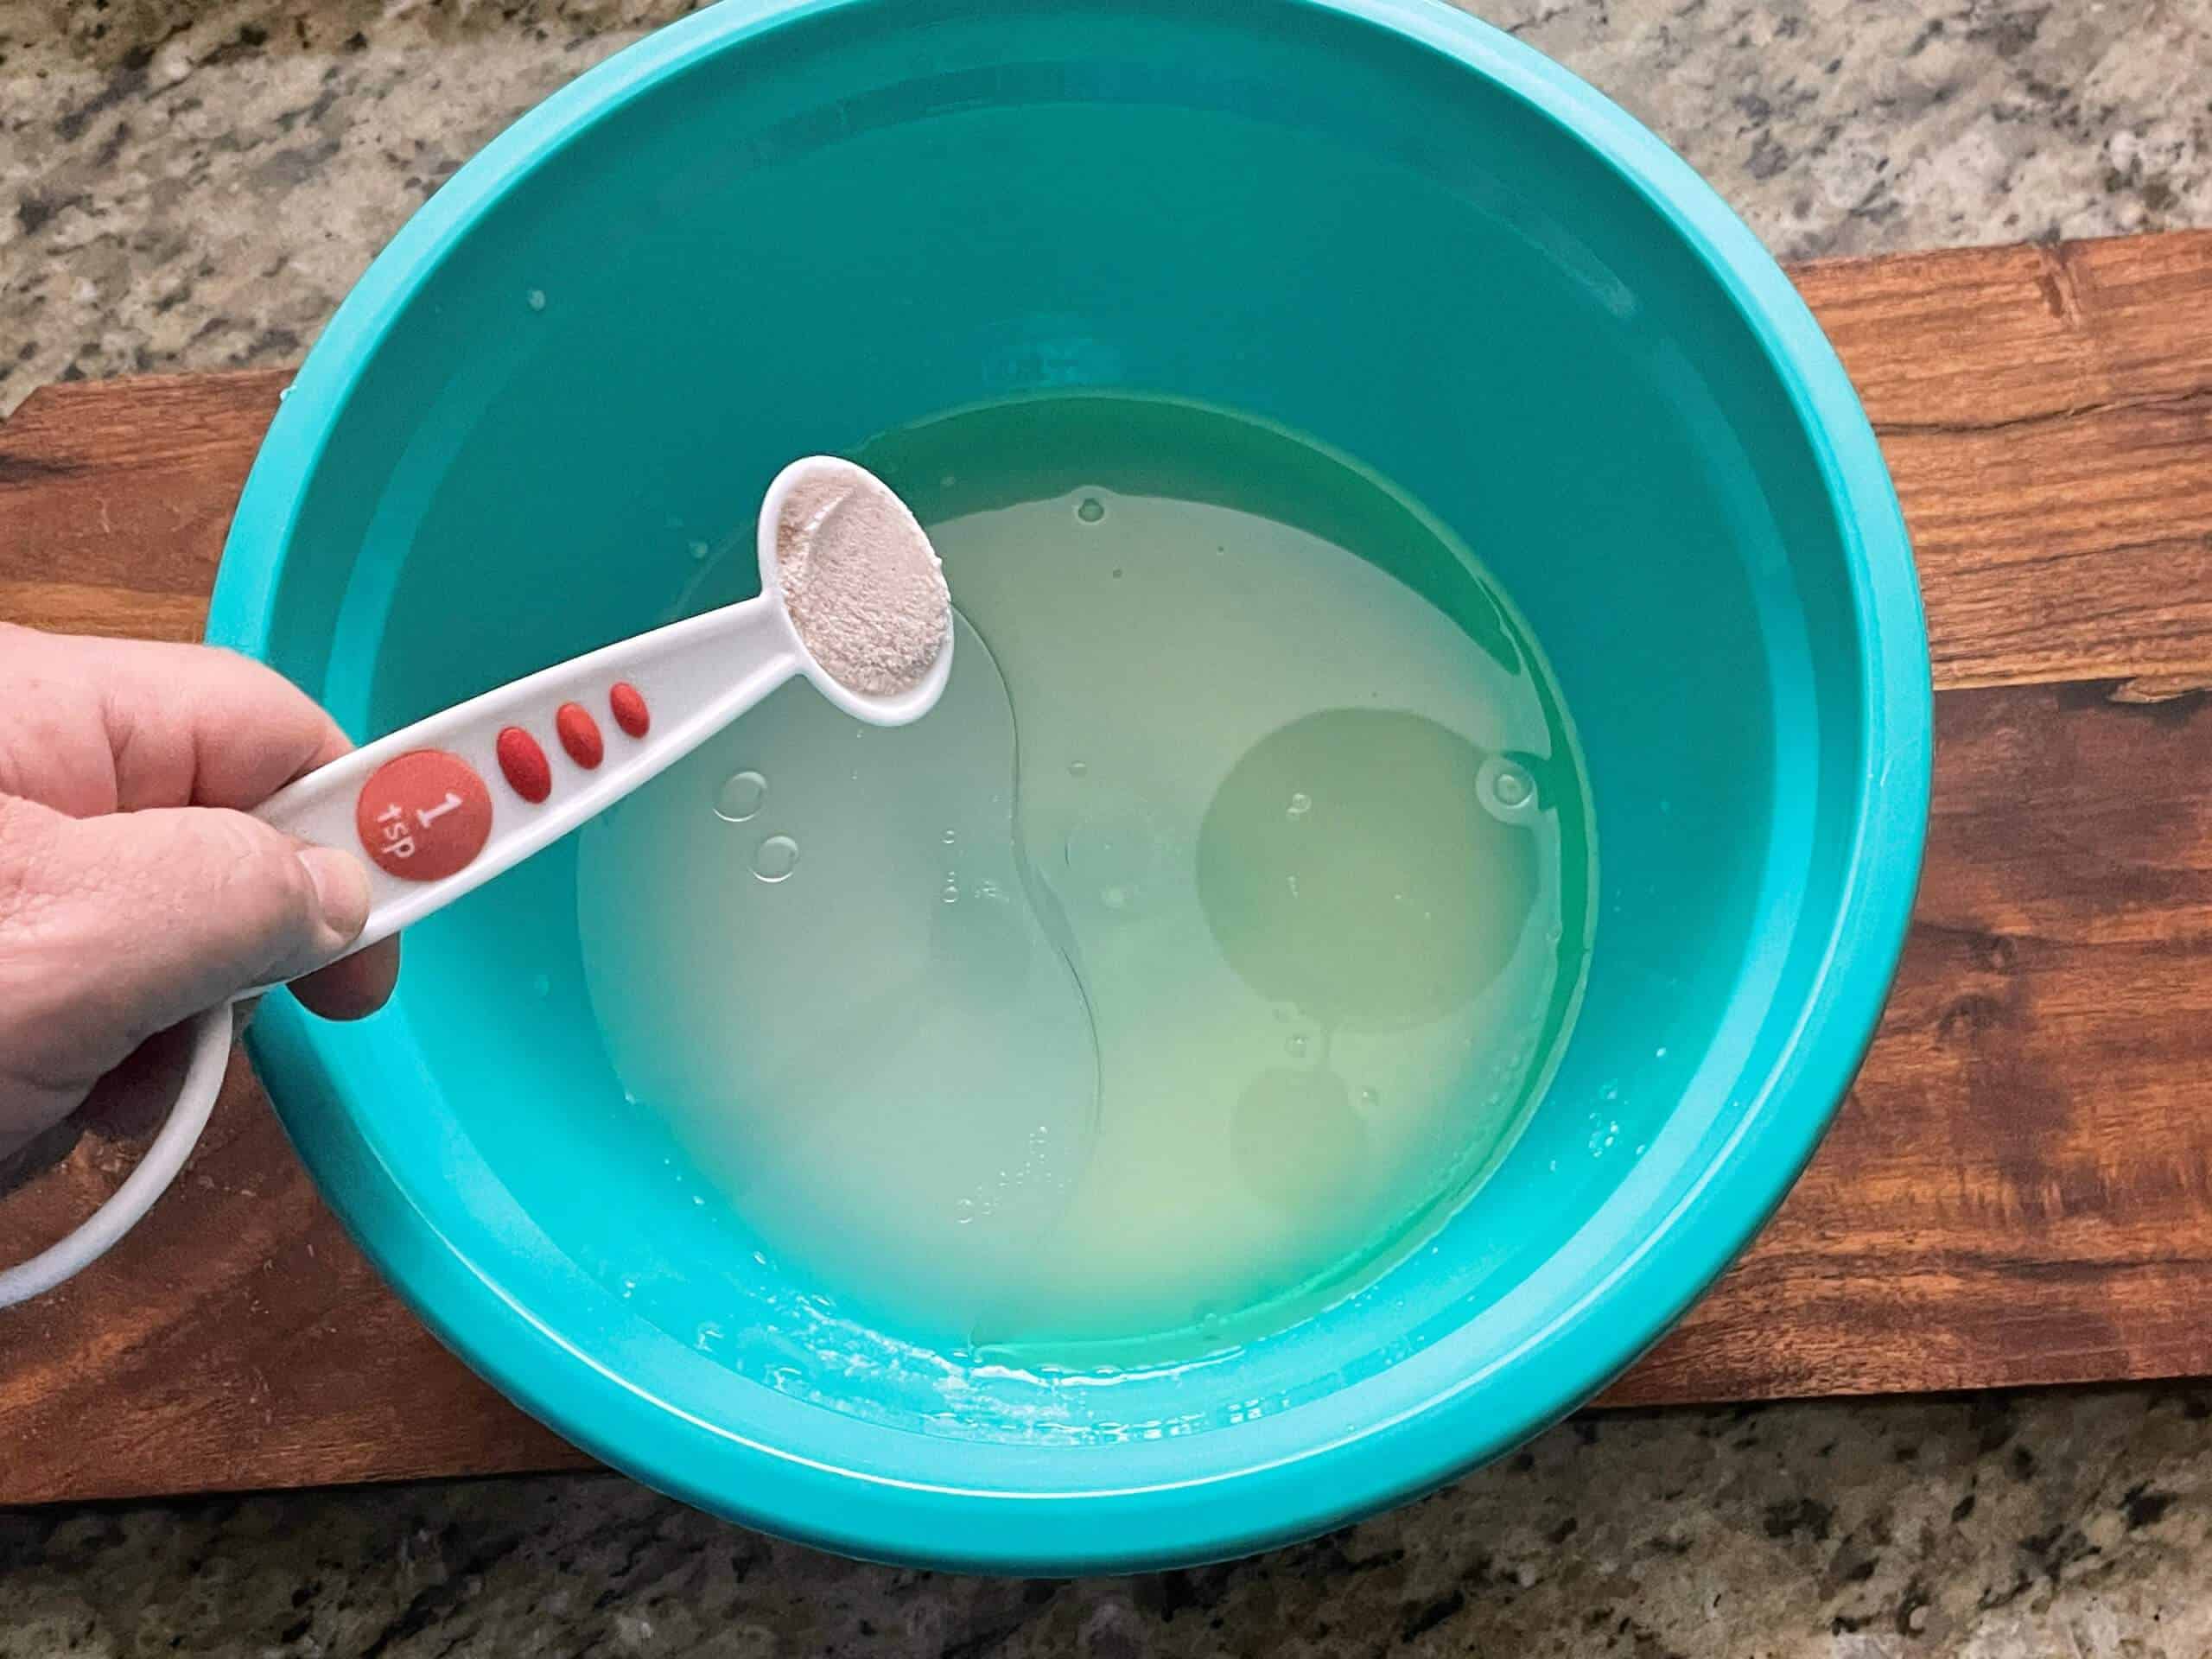
Step 2: Next, add the sugar and salt. Mix to dissolve the sugar and salt in the mixture.
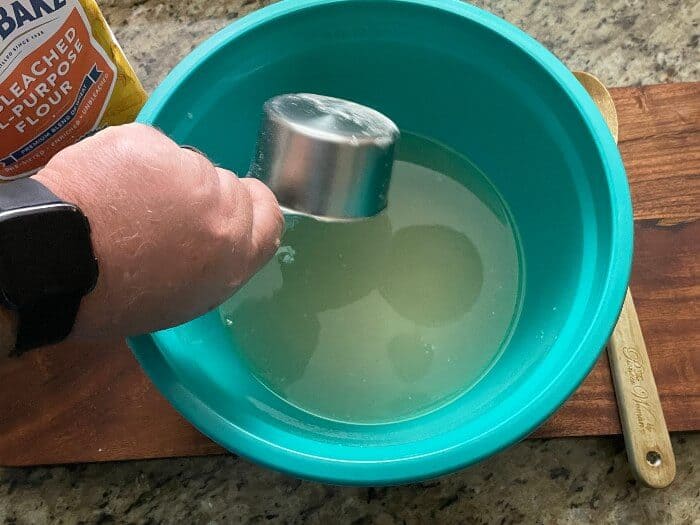
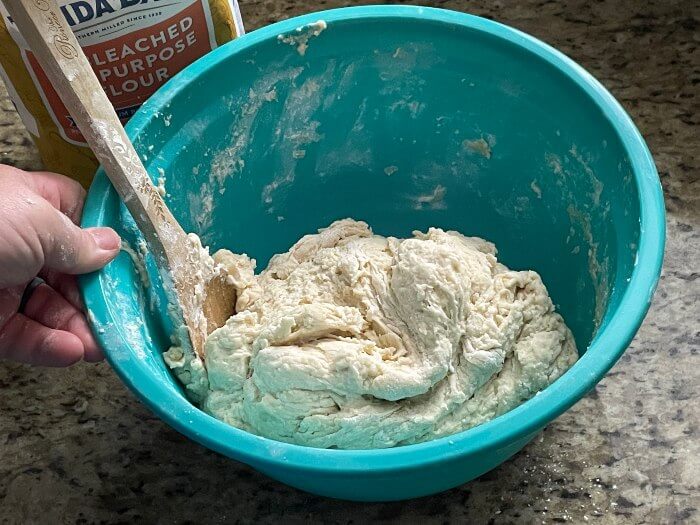
Step 3: Add in the 6 cups of flour.
Step 4: Mix until all the flour has been incorporated and a ball is starting to form.
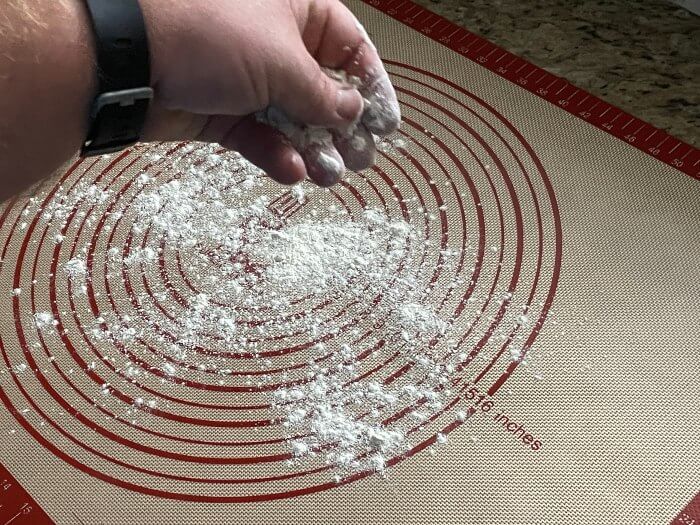
Step 5: Turn the ball of dough out onto a floured work surface. If you have a pastry mat, that works well too.
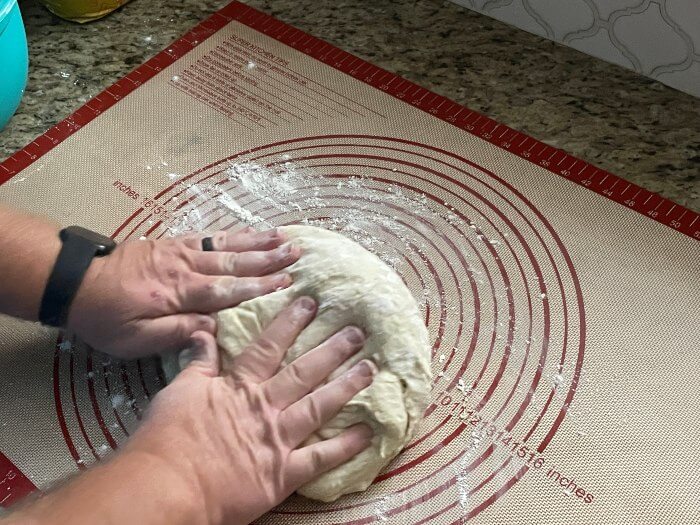
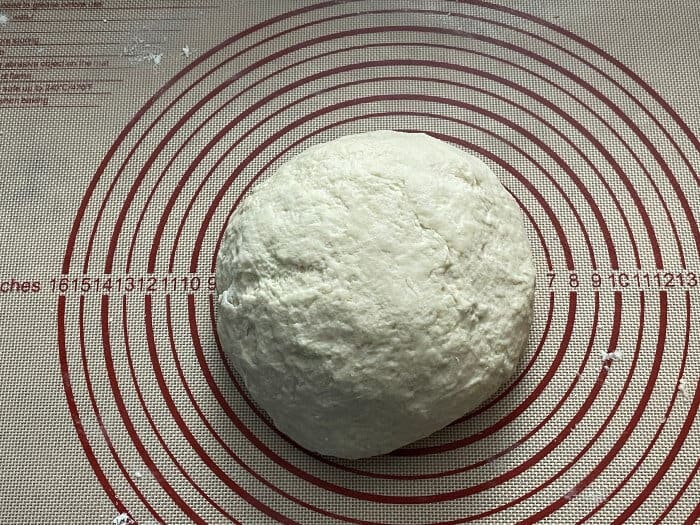
Step 6: Knead until you have a slightly smooth dough ball formed. It should be a little sticky but not too sticky. If you have a stand mixer, use the dough hook and this will make light work out of this step.
Step 7: Place the ball into a clean bowl. I like to add a little vegetable oil to the ball and smear it around. This helps to prevent the dough from sticking to the bowl. I also like to put a little bit of oil on top of the dough to keep it from drying out.
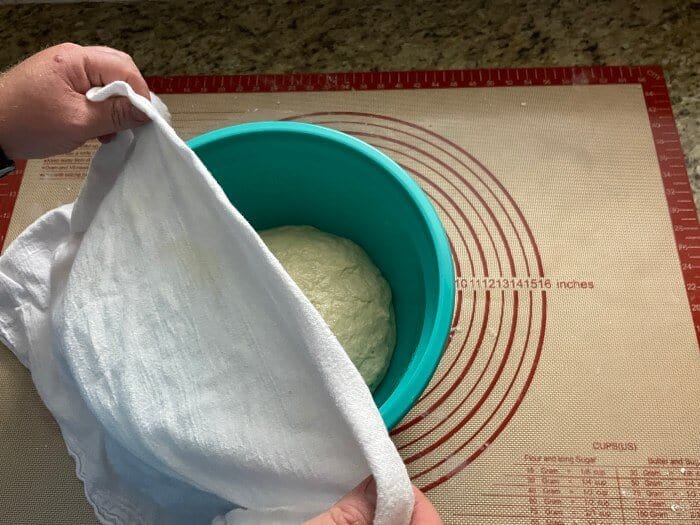
Step 8: Cover the bowl with plastic wrap, a tea towel, or Cheesecloth. You could also use parchment paper to cover it as well. Place in a warm place to let the dough rise for the first time. The rise time will vary but I let mine go overnight. Typically you want to a least let it double in size which should take 4 to 8 hours.
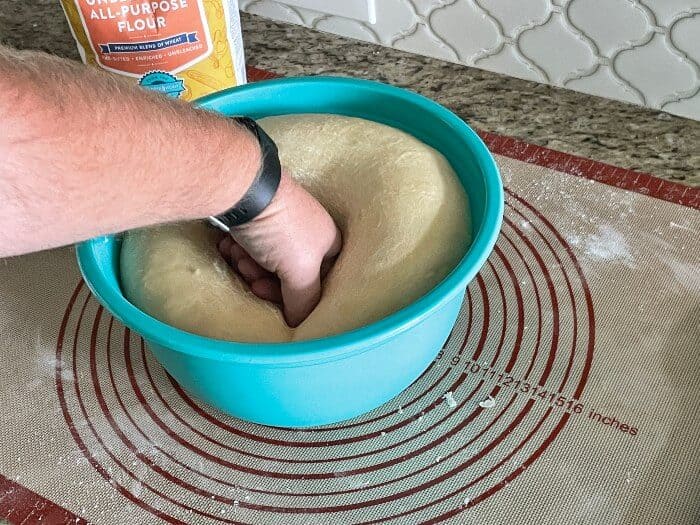
Step 9: The next day or after the dough has doubled in size, punch the dough down, then turn it out onto a floured surface again.
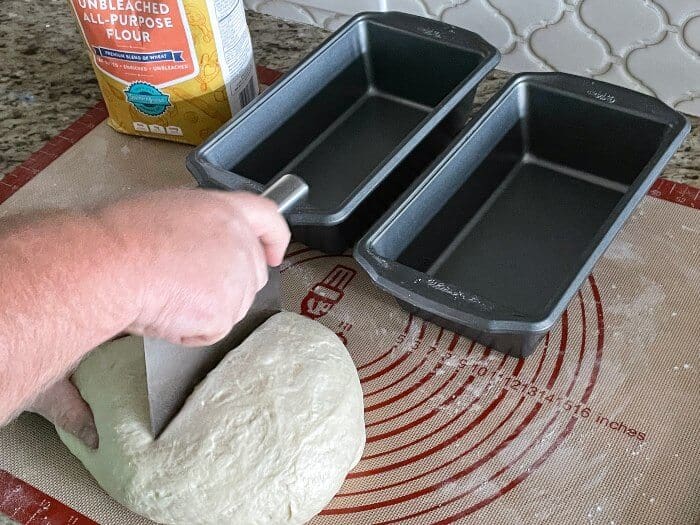
Step 10: Knead for several minutes, then divide the dough in half so both sections are equal amount.
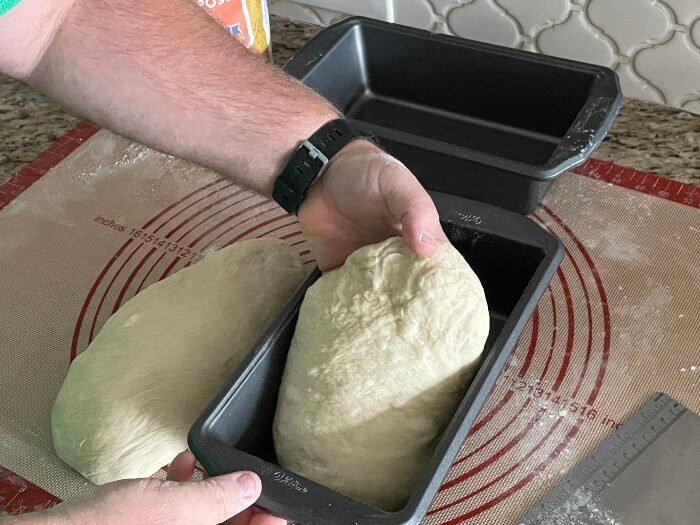
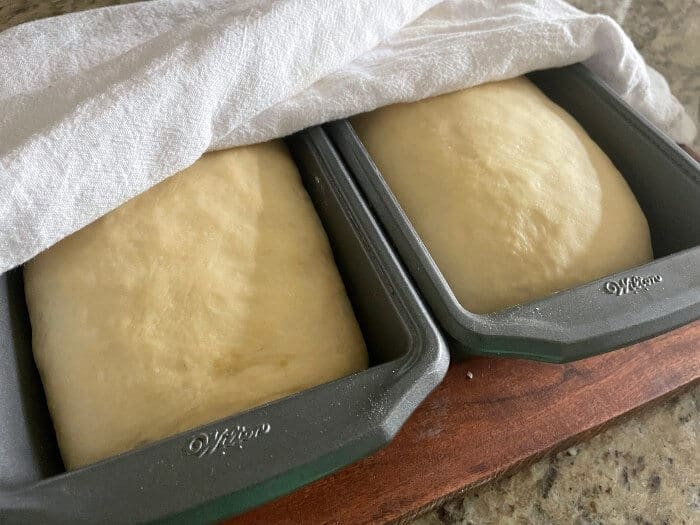
Step 11: Place the dough into two baking loaf pans, seam side down. I will oil the sides of the pan with Crisco or vegetable oil to keep it from sticking. This will be the second rise. Let the loaves double in size.
Step 12: Preheat the oven to 350 degrees. Bake the loaves for 35 to 40 minutes bake time, or until golden brown.
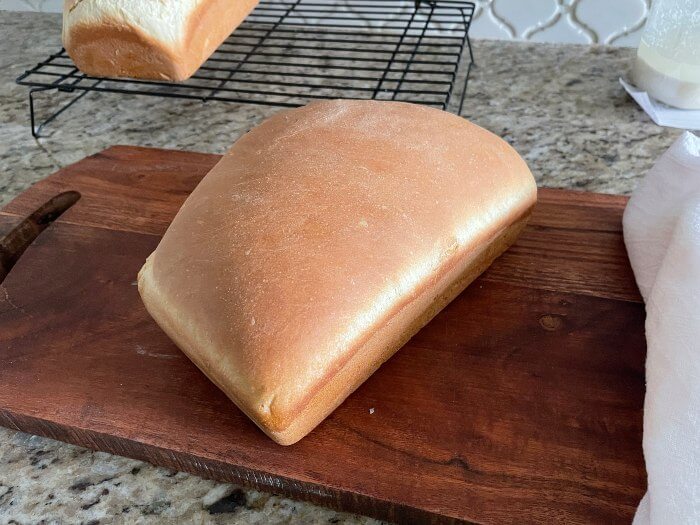
Step 14: Remove from the oven and take out the pans immediately. Place the loaves on a cooling rack uncovered.
Let them cool down to room temperature before cutting into them. The crust on the bread has to be set and this cooling down process also lets the remaining moisture escape. This will cause your bread to remain fresher for longer.

Note: This recipe revolves around the feeding of the starter. If you feed the starter in the morning, you will mix the bread up in the evening and bake it the next day.
If you feed the starter at night, you will mix the bread up the next morning and then bake it that evening. You can do it however you wish and in whatever way, it works out best for you. The main thing is to plan it out.
Here is a Few of My Favorite ways to use this Bread:
- Serve with Roasted Whole Chicken Breast Recipe [Juicy Cajun Style]
- Sourdough Grilled Cheese Sandwich
- Sourdough French Toast
- Toasted with salted butter on top
- Goes great as a side bread with any Southern meal
FAQ’s
How many Loaves will this recipe make?
This recipe will make two loaves of bread if you are using a 9 x 5 bread pan.
What Size Bread Pan Should I use?
I recommend using a 9 x 5 bread pan. I have used Wilton 9x5 nonstick loaf pans for many years with good success.
Can I Bake It in a Larger Loaf Pan?
Yes. You might not end up with two loaves that way, but rather one big loaf.
Can I Freeze The Bread After I Bake It?
Yes. I have personally tried this and it works great. Make sure to use a good-quality freezer bag to store it in. Make sure to let the bread cool all the way to room temperature before placing it in the bag. The taste is not quite as good as the day you made it but it will be close.
Thank you for choosing to read this post. We truly hope you enjoyed it. There are not many things better than fresh sourdough bread with butter on it! If you enjoyed this recipe, leave us a comment below. We would love to hear from you.
-Ronnie
Easy to Make Sourdough Bread using a Potato Flake Starter
As the name describes, sourdough is typically sour. The longer you let the starter ferment, the stronger the taste it has. By Using the easy to make potato flake starter, the bread will have a mild flavor. When I was young, My mom made sourdough bread using this easy to make sourdough bread using a potato flake starter. She would sell the loaves to friends and family members to raise money for Christmas. It was so good and everyone seemed to love it.
Ingredients
- 1 cup active sourdough starter, see recipe for easy to make sourdough starter from potato flake
- 1 ½ cup lukewarm water
- ½ cup vegetable oil
- ½ cup white granulated sugar
- 1 ½ teaspoon sea salt or Kosher salt
- 6 cups bread or all purpose flour
Instructions
- Step 1: In a large bowl, add 1 ½ cups of lukewarm water. Then add in 1 cup of starter and ½ cup of vegetable oil.
- Step 2: Next, add the sugar and salt. Mix to dissolve the sugar and salt in the mixture.
- Step 3: Add in the 6 cups of flour.
- Step 4: Mix until all the flour has been incorporated and a ball is starting to form.
- Step 5: Turn the ball of dough out onto a floured work surface. If you have a pastry mat, that works well too.
- Step 6: Knead until you have a slightly smooth dough ball formed. It should be a little sticky but not too sticky. If you have a stand mixer, use the dough hook and this will make light work out of this step.
- Step 7: Place the ball into a clean bowl. I like to add a little vegetable oil to the ball and smear it around. This helps to prevent the dough from sticking to the bowl. I also like to put a little bit of oil on top of the dough to keep it from drying out.
- Step 8: Cover the bowl with a plastic wrap, a tea towel, or a Cheesecloth. You could also use parchment paper to cover it as well. Place in a warm place to let the dough rise for the first time. The rise time will vary but I let mine go overnight. Typically you want to a least let it double in size which should take 4 to 8 hours.
- Step 9: The next day or after the dough has doubled in size, punch the dough down, then turn it out onto a floured surface again.
- Step 10: Knead for several minutes, then divide the dough in half so both sections are equal amount.
- Step 11: Place the dough into two baking loaf pans, seam side down. I will oil the sides of the pan with Crisco or vegetable oil to keep it from sticking. This will be the second rise. Let the loaves double in size.
- Step 12: Preheat the oven to 350 degrees. Bake the loaves for 35 to 40 minutes bake time, or until golden brown.
- Step 14: Remove from the oven and take out of the pans immediately. Place the loaves on a cooling rack uncovered. Let them cool down to room temperature before cutting into them. The crust on the bread has to be set and this cooling down process also lets the remaining moisture escape. This will cause your bread to remain fresher longer.
Notes
Note: This recipe revolves around the feeding of the starter. If you feed the starter in the morning, you will mix the bread up in the evening and bake it the next day. If you feed the starter at night, you will mix the bread up the next morning and then bake it that evening. You can do it however you wish and whatever way it works out best for you. The main thing is to plan it out.

Nutrition Information:
Serving Size:
1 gramsAmount Per Serving: Unsaturated Fat: 0g
Also, try these delicious recipes as well:
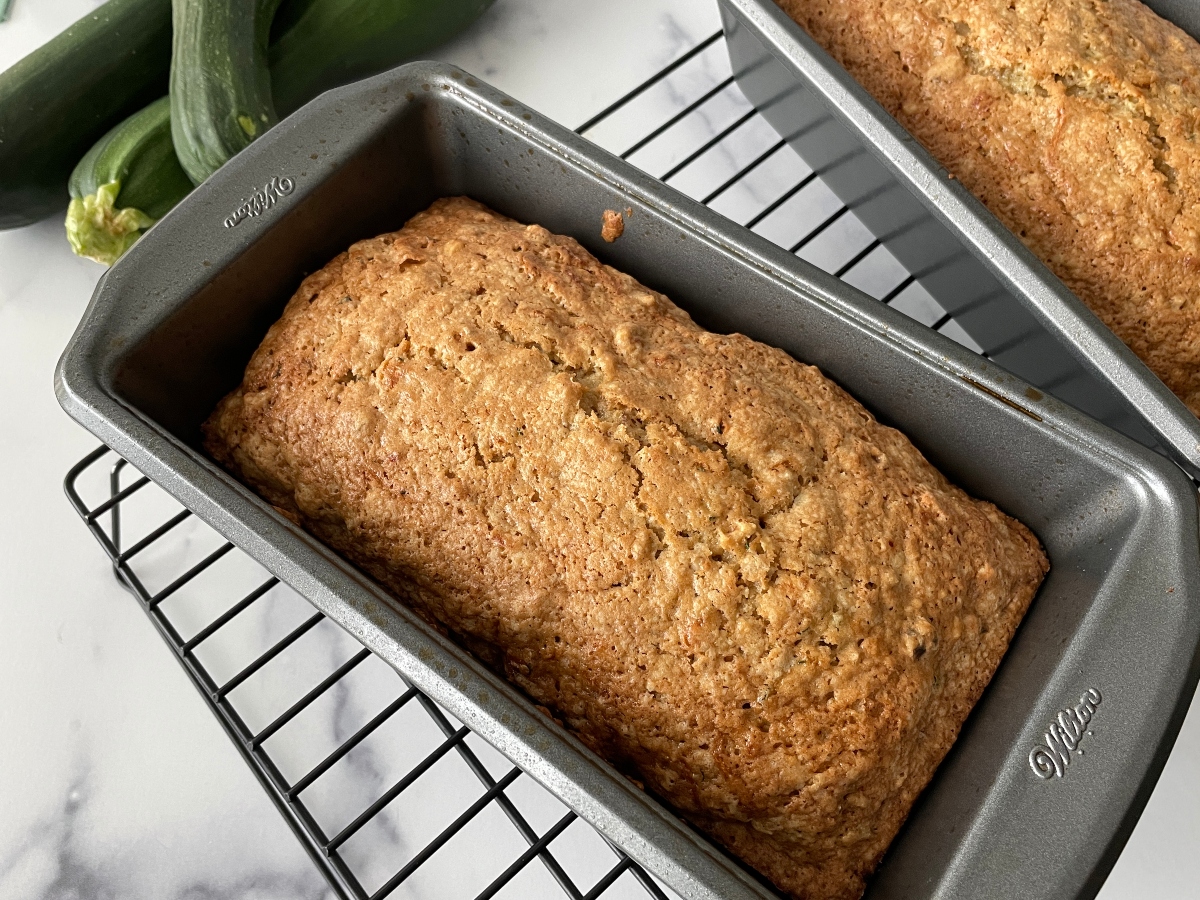
Grandma's Best Zucchini Bread Recipe
Marinade for Smoked Beef Jerky
Chicken Bog | A Traditional South Carolina Dish
Southern Food Junkie Chili
Brunswick Stew
Home

Anna Hennington says
Do you have a method for baking a sourdough round? I'd love to use my potato flake starter to create a sourdough round that has a good crispy outer shell and soft middle but can't seem to figure it out! Any tips would be helpful!
Ronnie Williams says
I haven't tried doing that yet. I am sure it can be done but I think if you want a crispy outer crust, you would have to use the traditional sourdough starter. It creates that hard, crunchy outer crust. I might try to play around with it and see what I can come up with though. The next thing I want to make is sourdough cinnamon rolls with the potato flake starter! Thanks for your comment.
Craig Whitley says
Have tried this 3 times so far.
Pros:
The Potato Flake starter is easy to maintain with zero waste in a 5 day schedule.
Very nice taste and a very universal bread which does not overpower the middle stuff {cheese, meat, etc}.
Cons:
The first batch bulk fermented so fast at 77F, I had to shape it at 4AM.
I tried using cold water/cold Potato starter and bulk fermented @ 68F and now had a nice 8-9 hour bulk ferment with a solid doubling of the dough. But all 3 times, the 2nd rise after shaping died off at about 2 hours and got zero oven spring. I even tried my Clay Baker using the entire recipe but same poor 2nd rise and again zero oven spring.
As the taste is so good and I like the ease and zero waste of the starter, I just need to get a better 2nd rise.
Ed Fritzsche says
Just started making the potato flake starter. Making bread, seems a bit too sticky. I'm wondering if I should cut back water or add more flour. Any suggestions.
Ronnie Williams says
Hey Ed! It should be a little sticky but if you feel it is too much, you can add a little bit at a time. Make sure to turn it out on your surface first and try to need it a few times, then add a little bit of flour at a time. But remember, it should be a little sticky. Thanks for your comment.
Faye says
Can the sugar be reduced when making the bread?
Ronnie Williams says
I have honestly never tried to reduce it. I say try it and experiment and see. Just a warning though, you may want to reduce it because of sweetness, this could also lead to a bland taste. Just as salt brings out the flavor in foods, sugar does the same. It also helps the bread to brown up. If you do try it, I would say to try it a little at a time.
Thanks for your comment.
Ann Hodges says
Thanks for sharing your starter and bread recipes. This is the fifth day of making the starter and my first try at your bread recipe. I never could get the dough to form into a ball. I had a big gooey sticky glob. I even tossed it into my Kitchen Aid with dough hook and added some more flour. Still wouldn’t form a ball. Tried to knead by hand and it stuck to everything it touched. I finally placed the unformed dough into the bowl to rise. Hoping it will properly rise anyway. Someone gave me a starter a long time ago and I kept it going for many years. That bread recipe didn’t call for kneading before the first rise, so I’m hoping this recipe will work the same as that one did. Crossing my fingers.
Wondering if you have had that happen before and how you resolved it.
Ronnie Williams says
Anytime mine is sticky, I just add a little flour at a time until it isn't so sticky. It should be a little sticky on the first rise though. When I am measuring my flour, I make sure I pack it in the cup and use the back of a butter knife to scrap across. This ensures we get the right amount of flour. Fingers crossed it works out for you.
Thanks for your comment.
Ann Hodges says
@Ronnie Williams, the bread actually rose and baked up just fine. To shape into loaves, I had to knead the dough for a very long time and kept sprinkling the dough and pastry board with a good bit of flour in order to handle it. But it worked. The overnight first rise was about to come out of the bowl when I checked it at around eight hours. The second rise in the pans only took about four hours and was ready to bake. I fed the starter again this morning and I’m going to mix up the dough in a few minutes. I think I’m going to start with just one cup of water and add more as needed. Hoping I can control the stickiness a little better that way. I’ll let you know how it goes.
Ann Hodges says
@Ronnie Williams, following up on my second bake. I went ahead and mixed up using the full 1 1/2 cups of water in my stand mixer bowl and mixed for five minutes on low speed. Placed it straight into greased bowl without attempting to knead by hand or form a ball. Patted it down a little with oiled fingers. Overnight rise was perfect. Was easy to knead into two loaves. Ready to bake in four hours rise time. The baked loaves were perfect! I only had four cups of bread flour so I added two cups wheat flour and made wheat bread. The result was absolutely delicious! Thanks again for the starter and bread recipes.
B gibson says
I love this bread. My first batch turned out great. The second turned out a bit different as it seemed too dense. The second rise also was not like the first. What did I do wrong to make it turn out so dense?
Ronnie Williams says
Hey B Gibson,
That is awesome it turned out so great the first time. It is hard to tell what you did differently between the two times. A few things come to mind maybe you had too much flour and it was too dry. You might have kneaded it too long as well. The dough should be sticky and stretchy after that first rise. Also, did you take the starter out of the refrigerator and feed it right then? That is how I do mine. Then it needs to set out for 6 to 8 hours before you take off your cup of starter to make the bread with. I hope those tips help you out.
Thanks so much.
Pam says
What is the ingredients for this starter, please?
Ronnie Williams says
Hey Pam,
Sorry for the late response. For some reason the comments are not coming to my email. To answer your question, here is the recipe for the starter: https://southernfoodjunkie.com/easy-to-make-sourdough-starter-using-potato-flakes/
Thanks again.
Luann says
Can i add/substitute some whole wheat flour to this recipe
Ronnie Williams says
I have experimented with that on my Bread Machine White Bread recipe but not this one. I honestly do not know how it would work but it is worth a try. If you do try it, please come back and leave us a comment to let us know how it went.
Thanks,
Ronnie
Jan says
I love this bread recipe. When I take my bread out to cool it is like air between the crust and top of the bread! The crust detaches when I slice the bread . Can’t figure what is happening! I have been baking for 35 minutes and buttering the top. Maybe bake longer? No butter?
Ronnie Williams says
Hey Jan,
Thanks for your comment and question. If you are buttering the top, I find that will cause the crust to get bubbles in it. My mom always did that growing up and it gives it a great flavor but I stopped doing it myself. I also do not cover the bread as it cools off. I find that will cause the top to bubble too. I take my bread out of the pan as soon as I remove it from the oven, then I lay the loaves on cooling racks. I leave it uncovered until it has reached room temperature. This causes all the moisture to release and allows for a better crust to set. Try that and see if it helps any.
Thanks in advance,
Ronnie
Jan says
@Ronnie Williams, I made bread today and did not butter the crust and it did much better! Thanks for the information! Love the bread!
Emily says
My first loaves are currently on their second rise and I'm so nervous! I think my kitchen may be a little too warm because I let them rise overnight and the dough was almost spilling out of the bowl. Could I have done something wrong or is it likely temperature? Thank you for sharing your recipes and knowledge!
Ronnie Williams says
Hey Emily,
I prefer a warm kitchen to a cool or cold one. I think it helps and it sounds like you have a very active starter. I say go with it and see how it turns out. I have had mine do that before and it turned out great. Thanks for your comment.
-Ronnie
DD says
Can you use gluten free four??
Most GF bread is horrible and dry. Hoping to find one that is actually soft and tastes good!
Ronnie Williams says
Hey DD,
I have not tried Gluten Free flour yet with this recipe. Maybe I will experiment with that soon. I am trying to roll out some more recipes based around the starter. Today I made Sourdough Cinnamon rolls. I will try to get around to experimenting with the gluten free flour because I know how important that is for some folks.
Thanks,
-Ronnie
Belinda says
@Ronnie Williams,
did you try the cinnamon rolls?
I did & they are wonderful! The family loved them! I’ve made them twice & today I’m making them again! My dough is on its first rising!
Thank you for this recipe, my daughter in law showed it to me & she got me hooked on it! To be honest I’m not as fond of the bread, because it is too dense & heavy! I’m just not doing something right!?!
Ronnie Williams says
Hey Belinda,
Yes! and I posted a recipe on them as well. They turned out so good. Everyone loved them. Here is that recipe if you want to peek at mine.
https://southernfoodjunkie.com/sourdough-cinnamon-rolls/
You are welcome and I am glad you are enjoying it. Yeah the bread should not be that dense and heavy. It should be more similar to homemade white bread if you have ever made that. Keep at it, it is like making biscuits, it just takes practice to get it right.
Thanks so much.
MK says
@Ronnie Williams, I would love to see some more recipes that call for this potato flake starter. I've read that it's thinner than a traditional flour sourdough starter so it cannot be used 1-for-1 with recipes unless the recipe is designed for a potato flake sourdough starter. I will be interested to try your new creations. Also wondering if you ever tried making the regular potato flake sourdough bread as a round in a dutch oven?? Thank you!
Ronnie Williams says
Hey MK,
Thanks for stopping in to comment. I will try to work on some more recipes using the sourdough potato flake starter. For now, this is the only other one I have: https://southernfoodjunkie.com/sourdough-cinnamon-rolls/
I have made dinner rolls with this starter before so I need to write that up and post it. I have not tried to make the bread in a dutch oven but I would think it would pretty simple to do. Divide it and make each loaf round. You would just have to check in on it to see when it is done.
Thanks again,
-Ronnie | Let's Get Food Junked
Donna says
What are your thoughts on making a dozen rolls in a pan instead of loaves? What would I do differently?
Ronnie Williams says
I have actually done this before. I used a round cake pan and rolled out little balls of dough, roughly about 2 inches. Then lined the pan with dough balls. I think I ended up with two pans of rolls. They were really good but they get dry really fast. The day you make them they are great, but after the 2nd or 3rd day, they get a bit dry if they were not eaten. I plan on making a formal recipe on this one day. Give it a try and let me know what you think.
Thanks,
-Ronnie
Michele Thompson says
Do you have other recipes using this starter? I was blessed with a family starter from a dear friend. However, all they make is bread and rolls. I dream of a lot more.
Thanks for sharing.
Ronnie Williams says
Good morning Michele,
I do have a Sourdough Cinnamon Roll recipe that uses this same starter. You basically make the bread the same way but once you split it, that is where this recipe picks up.
Here is the link to it: https://southernfoodjunkie.com/sourdough-cinnamon-rolls/.
Hopefully I will get more out in the future. Thanks for asking.
Have a great day,
-Ronnie
Linda says
I have been making your bread recipe turns out great and taste great! Thanks for sharing! By the way I am 71 years old Mother of two and grandma of 6 and have two great grandchildren!
Ronnie Williams says
Good morning Linda,
Thanks so much for sharing! I am glad to hear you love it. Keep baking!
Thanks again,
-Ronnie | Let's Get Food Junked!
Ellen says
This bread is amazing! I have tried a to keep a starter twice now and I can't seem to keep it active. The first few batches are great and then on the 5th or 6th week the starter seems lifeless. I feed it right after taking it out of the fridge and after 8 hours on the counter you can hear it bubbling a little but it is very watery and does not get as bubbly as before. Do you ever have this problem? Is there a way to strengthen the starter like you do regular sourdough?
Ronnie Williams says
Hey Ellen,
Thanks so much for the comment. No, I usually find that it gets stronger the more often I use it. That is odd that yours is getting weaker. My is always watery and I rarely ever see bubblies in mine. The only thing I notice is after a hour or so after sitting out, the potato flakes will float to the top. Other than that, no action at all.
Thanks in advance,
Ronnie
Paige says
Have you ever made this dough using a bread machine? Then take it out to shape it and allow for second rise?
Ronnie Williams says
Hey Paige,
I have not but I don't see why it wouldn't work for you if you do like you are saying.
If you try it, let me know how it worked out for you. My machine broke a year or so ago and I have not replaced it yet.
Thanks,
Ronnie
Jamie says
Have you ever used butter in the bread recipe instead of vegetable oil?
Ronnie Williams says
I have not but I am sure it would work. I use Olive oil all the time.
Cathy says
Didn’t rise in large bowl. So disappointed. What did I do wrong? I leave at the beach should I have adjusted something differently.
Ronnie Williams says
No rise at all? Did you just make your starter? When it rise, you should look for it to double in size, it may not fill the bowl if you used a super large one. Give me some more details and I will see if I can see what went wrong. The beach should not have affected it though. Normally higher elevations would but not lower elevations.
Thanks,
Ronnie
Janet says
First time trying this recipe. I decided to make the rolls instead of a loaf. I pulled it out of the oven a little early since the tops were a nice light brown color. However, the tops seem very hard. When I push one with my finger it cracks. Did I do something wrong?
P.S. thanks for the recipe for potato flake starter. I use it to make cinnamon rolls and croissants all the time!
Ronnie Williams says
The only thing I can think of is when making rolls they will cook a little faster than the loaf of bread. You might lower the temperature and keep an eye on them to brown. Also, everyones oven cooks slightly different. I use a gas oven. I have made the rolls too and never noticed my hard on top. I hope this helps.
Lynn says
I just made two loaves that turned out great. How do you recommend storing the loaves after they cool?
Ronnie Williams says
That is awesome. I personally use these bags I get off of Amazon here: https://amzn.to/3NgLchN
You could also save old bread bags or put in ziplock bags. It is hard to get them in a gallon ziplock bag though.
Good luck!
Sharon Cauble Holliday says
I really love your recipes and instructions. Thank you for posting everything for us. We really appreciate it. I know you’ve been asked this before but … after I take the starter out to make my bread do I feed the rest of my starter before I put it in the refrigerator or just when I take it out to make bread. I’m sorry I get a little confused on the part. My bread is always wonderful!
Thanks again ❤️
Ronnie Williams says
Thanks Sharon. I appreciate that. So if you are making bread or just feeding the starter, you take it out of the refrigerator, then feed it. You let it sit for 6-8 hours then stir it and remove 1 cup. The remaining in the jar you put right back in the refrigerator. The 1 cup you removed, you either use it to make bread, give it away for someone to use, or discard it. Does that answer what you are looking for?
Kylie says
Hello! Approximately how long should the second rise be? thank you!
Ronnie Williams says
Hey there! You typically want to wait until it doubles in size and that can vary but I normally see that it takes 2 to 4 hours.
Kylie G says
Love this recipe. Can it be made into rolls? Or do you have a roll recipe with this starter?
Ronnie Williams says
I have used it to make rolls before and they were great. I just took the bread recipe and instead of forming two bread loafs, I rolled little 3 in balls and put them in a round pan. Turned out great. I do have a cinnonmon roll recipe on my website as well using this same starter: https://southernfoodjunkie.com/sourdough-cinnamon-rolls/
Sondra Vega says
I had this starter given to me years ago. It had been fed and used for over 70 yrs. I fed it over 30 yrs.
I was in the hospital and came home to a clean fridge. My hisband thought it was something sour and threw it out. I didn’t talk to him for at least 2 months !!!!
Ronnie Williams says
Oh man, it was like an old friend you had it so long. Sorry to hear that.
Madison says
I made this today and instead of using the loaf pans I used a 2.2lbs sandwich bread box and all I have to say is she’s gorgeous. I haven’t cut in yet but if I could add a picture I so definitely would. By far this has been the easiest bread I have ever made. Thanks for the recipe!!
Ronnie Williams says
Madison,
Thanks so much for your comment. I appreciate you leaving feedback and I am glad you liked making it. This bread is so yummy and I hope yours was too.
Thanks,